Difference between revisions of "20.109(S20):Purify TDP43 protein (Day2)"
Noreen Lyell (Talk | contribs) (→Part 2: Lyse BL21-A1 pET_MBP_SNAP_TDP43-RRM12 cells) |
Becky Meyer (Talk | contribs) (→Part 4: Purify TDP43-RRM12) |
||
| Line 67: | Line 67: | ||
#Retrieve your cell pellets from the centrifuge and transfer the supernatent to a fresh 2 mL tube. | #Retrieve your cell pellets from the centrifuge and transfer the supernatent to a fresh 2 mL tube. | ||
#Add 10 μL of the SnapTag substrate / buffer reaction to the supernatent. | #Add 10 μL of the SnapTag substrate / buffer reaction to the supernatent. | ||
| − | #*'''Note:''' the SnapTag substrate / buffer reaction | + | #*'''Note:''' the SnapTag substrate / buffer reaction allows the TDP43 protein to be labeled with a 647nm fluorophore at the SNAP sequence incorporated into the protein construct |
#Transfer the supernatent to the slurry prepared in Step 3. | #Transfer the supernatent to the slurry prepared in Step 3. | ||
| − | #*'''Note:''' the slurry consists of a nickel resin that | + | #*'''Note:''' the slurry consists of a nickel resin that is capable of binding His-tagged proteins |
#Use aluminum foil to wrap the tube such that the supernatent / slurry are protected from light. | #Use aluminum foil to wrap the tube such that the supernatent / slurry are protected from light. | ||
#Incubate the supernatent / slurry for 2 hr (or until 4:30p, be sure to record the exact incubation time in your notebook!) in the 4 °C cooler on a nutator. | #Incubate the supernatent / slurry for 2 hr (or until 4:30p, be sure to record the exact incubation time in your notebook!) in the 4 °C cooler on a nutator. | ||
Revision as of 17:03, 3 February 2020

Contents
Introduction
To induce production of TDP43-RRM12 from the expression vector you 'cloned' in the previous laboratory session, we used the lactose-analogue isopropyl β-D-1-thiogalactopyranoside (IPTG) and arabinose to induce expression in BL21-A1 bacteria cells. The use of IPTG to induce protein expression is based on the native lac operon used for lactose metabolism in bacterial cells.

The native lac operon is a powerful tool in engineering protein expression systems because it enables researchers to control gene expression using inducer molecules. The lacZYA genes are only expressed when lactose is present. If a gene of interest is cloned downstream of the operator sequence, the expression of this gene can be controlled by LacI repression and lactose derepression. To further control the system for protein expression, IPTG is used as a lactose-analog as it is not metabolized by the cells.

Today you will isolate your TDP43-RRM12 protein (remember that is a truncated version that only contains RRM1 and RRM2!) from the bacterial cells. Remember that the TDP43 sequence was cloned into a vector that contains six histidine codons at the 5' end of the DNA sequence. Our resultant protein is therefore marked by the presence of these additional encoded residues, also referred to as His-tagged. Histidine has several interesting properties, notably its near-neutral pKa, and His-rich peptides are promiscuous binders, particularly to metals. (For example, histidine side chains help coordinate iron molecules in hemoglobin.)

You will use a nickel-agarose resin to separate TDP43-RRM12 from the other proteins present in the bacteria. The His-tagged protein will preferentially bind to the nickel-coated beads, while proteins irrelevant to our purposes in Module 1 can be washed away. Remember, the BL21-A1 cells are not only producing your protein, but also the proteins needed for cellular function and survival. Finally, a high concentration of imidazole (which is the side chain of histidine) can be used to elute the His-tagged TDP43-RRM12 by competition.

Protocols
Part 1: Agarose gel electrophoresis of confirmation digests
Electrophoresis is a technique that separates large molecules by size using an applied electrical field and a sieving matrix. DNA, RNA and proteins are the molecules most often studied with this technique; agarose and acrylamide gels are the two most common sieves. The molecules to be separated enter the matrix through a well at one end and are pulled through the matrix when a current is applied across it. The larger molecules get entwined in the matrix and are stalled; the smaller molecules wind through the matrix more easily and travel farther away from the well. The distance a DNA fragment travels is inversely proportional to the log of its length. Over time fragments of similar length accumulate into “bands” in the gel. Higher concentrations of agarose can be used to resolve smaller DNA fragments.

DNA and RNA are negatively charged molecules due to their phosphate backbone, and they naturally travel toward the positive electrode at the far end of the gel. Today you will separate DNA fragments using an agarose matrix. Agarose is a polymer that comes from seaweed. To prepare these gels, agarose and 1X TAE buffer (Tris base, acetic acid, and EDTA) are microwaved until the agarose is melted and fully dissolved. The molten agar is then poured into a horizontal casting tray, and a comb is added. Once the agar has solidified, the comb is removed, leaving wells into which the DNA samples can be loaded.
You will use a 1% agarose gel with SYBR Safe DNA stain (prepared by the teaching faculty) to separate the DNA fragments in your four digested samples as well as a reference lane of molecular weight markers (also called a DNA ladder).
- Add 5 μL of 6x loading dye to the digests.
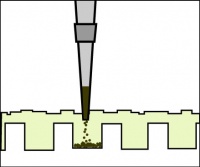 Illustration of proper gel loading technique.
- Loading dye contains bromophenol blue as a tracking dye to follow the progress of the electrophoresis (so you don’t run the smallest fragments off the end of your gel!) as well as glycerol to help the samples sink into the wells.
- Flick the eppendorf tubes to mix the contents, then quick spin them in the microfuge to bring the contents of the tubes to the bottom.
- Load 25 μL of each digest into the gel, as well as 10 μL of 1kb DNA ladder.
- Be sure to record the order in which you load your samples!
- To load your samples, draw the volume listed above into the tip of your P200 or P20. Lower the tip below the surface of the buffer and directly over the well. Avoid lowering the tip too far into the well itself so as to not puncture the well. Expel your sample slowly into the well. Do not release the pipet plunger until after you have removed the tip from the gel box (or you'll draw your sample back into the tip!).
- Once all the samples have been loaded, attach the gel box to the power supply and electrophorese the gel at 125 V for 45 minutes.

Part 2: Lyse BL21-A1 pET_MBP_SNAP_TDP43-RRM12 cells
Previously, the teaching faculty inoculated 5 mL of LB media with BL21-A1 pET_MBP_SNAP_TDP43-RRM12, incubated the culture at 37 °C for 7 hours and then stored at 4 °C overnight. The overnight culture was used to inoculate 50 mL of fresh LB media containing ampicillin at a 1:10 dilution. When the cells reached log phase, IPTG was added to a final concentration of 1 mM and arabinose to a final concentration of 0.2% were added to the E. coli bacterial culture to induce production of TDP43-RRM12.
The induced culture was incubated for ~2.5 hr at 37°C then the cells were collected by centrifugation at 3000 g for 10 min. The harvested cells were stored in the -80 °C freezer.
- Retrieve your BL21-A1 pET_MBP_SNAP_TDP43-RRM12 cell pellet from the front laboratory bench and leave it on your bench to thaw.
- You will also obtain a cell pellet of uninduced cells that was prepared by the teaching faculty as a control to examine the IPTG / arabinose induction step.
- Obtain a 3 mL aliquot of lysis buffer from the front laboratory bench.
- Calculate volume of imidazole needed in the lysis buffer such that the final concentration of imidazole is 10 mM (stock concentration = 2.5 M).
- Resuspend each pellet completely in 1.5 mL of the lysis buffer with imidazole then incubate at room temperature for 10 min on a nutator.
- Transfer the cells / lysis buffer to a 15 mL and alert the teaching faculty.
- A sonicator will be used to lyse the cells. In a process called soniporation, sound energy is produced via a sonicator and exerted through a probe that rests in the sample liquid. This results in lysis of the cell membrane which releases the cell contents. The Instructor will lyse your sample with the sonicator in the 4 °C cold room using the following settings: 50% duty cycle for 4 min at power 4.
- Because sonication is more effective when completed with larger volumes, you will combine your samples with those of two other teams. The Instructor will inform you which team samples should be combined.
- Divide each cell lysate between three 2 mL tubes (~1500 μL per tube) and centrifuge at 12,500g for 30 min.
- Transfer 30 μL from each tube (uninduced and induced) into labeled 1.5 mL eppendorf tubes and give the aliquots to the teaching faculty.
- You will use these aliquots to examine protein yield prior to purification using polyacrylamide gel electrophoresis (PAGE) on a later date.
- Moving forward, you will only complete the purification steps for the induced cell lysate and can trash the uninduced cell lysate.
Part 3: Prepare Ni-NTA affinity column
- Obtain a 500 μL aliquot of 50% slurry (Ni-NTA resin) from the front laboratory bench, mix the slurry by inverting the tube several times and pipette the slurry into the column.
- To wash the slurry, add 500 μL of 1X PBS and vortex for 10 sec.
- Centrifuge the slurry at 12,500g for 1 min then remove the supernatent using a P1000 pipette.
- Resuspend the slurry in 250 μL of 1X PBS.
- Leave the slurry on your benchtop until you are ready to add the cell lysate in Part 4.
- To prepare for the later steps, set up one purification column using the stand and clamp at your bench according to the example at the front bench.
Part 4: Purify TDP43-RRM12
- Retrieve your cell pellets from the centrifuge and transfer the supernatent to a fresh 2 mL tube.
- Add 10 μL of the SnapTag substrate / buffer reaction to the supernatent.
- Note: the SnapTag substrate / buffer reaction allows the TDP43 protein to be labeled with a 647nm fluorophore at the SNAP sequence incorporated into the protein construct
- Transfer the supernatent to the slurry prepared in Step 3.
- Note: the slurry consists of a nickel resin that is capable of binding His-tagged proteins
- Use aluminum foil to wrap the tube such that the supernatent / slurry are protected from light.
- Incubate the supernatent / slurry for 2 hr (or until 4:30p, be sure to record the exact incubation time in your notebook!) in the 4 °C cooler on a nutator.
- What is happening during this incubation? Hint: consider the purpose of the SnapTag and that of the nickel resin slurry.
- Following the incubation, transfer the supernatent / slurry to the column.
- Be sure to hold a 1.5 mL tube under the column to collect the flowthrough (liquid that drips from the column).
- Collect ~250 μL of the flowthrough (in a well-labeled 1.5 mL tube), the rest of the flowthrough is waste and will be collected in the beaker under the column.
- What is in the flowthrough? What is attached to the nickel resin slurry?
- To wash the slurry in the column, add 2.5 mL of 1X PBS containing 10 mM imidazole.
- Collect ~250 μL of the flowthrough (in a well-labeld 1.5 mL tube), the rest of the flowthrough is waste and will be collected in the beaker under the column.
- Repeat the 1X PBS with imidazole wash step a total of 3 times.
- Next, wash the slurry with 2 mL of HRV 3C buffer.
- Collect ~250 μL of the flowthrough (in a well-labeled 1.5 mL tube), the rest of the flowthrough is waste and will be collected in the beaker under the column.
- Cap the bottom of the column.
- Note: It is very important that the column is capped before the next step, if not the protein will be lost in the waste beaker!
- In the remaining 1 mL of HRV 3C buffer, add 10 μL of HRV 3C protease. Then add the HRV 3C buffer / protease to the capped column.
- Resuspend the slurry in the HRV 3C buffer / protease by pipetting up and down with a P1000.
- Add a cap to the top of the column and wrap the column in aluminum foil.
- Incubate the slurry overnight at 4 °C on a rotator wheel.
- The next steps will be completed by the teaching faculty, but should be included in your methods!
- Following the overnight incubation, uncap the base of the column and collect the flowthrough.
- Resuspend the slurry in 500 μL 1X PBS and transfer to a fresh tube.
Reagents
For gel electrophoresis:
- 1% agarose in water, with 10 uL SYBR Safe DNA gel stain per 100 uL agarose solution
- 1X TAE gel electrophoresis buffer: (BioRad)
- 40 mM Tris
- 20 mM acetic acid
- 1 mM EDTA
- 6X gel loading dye, blue (NEB)
- 1 kb DNA ladder (NEB)
For protein induction / purification:
- LB (Luria-Bertani broth, BD Biosciences)
- 1% Tryptone
- 0.5% Yeast Extract
- 1% NaCl
- autoclaved for sterility
- Ampicillin stock (sigma): 100 mg/mL, aqueous, sterile-filtered, store at -20 °C
- PBS: phosphate saline buffer (VWR)
- Ni-NTA agarose (Qiagen)
- AEBSF: 4-(2-aminoethyl)benzenesulfonyl fluoride (Sigma)
- Lysozyme from chicken egg white (Sigma)
- DNase I (1 unit/uL, Sigma)
- DTT : DL-dithiothreitol (Sigma)
- imidazole (Sigma)
- Tris (Sigma)
- NaCl (Sigma)
Next day: [[]]