20.109(F19):Load cells into CometChip and apply treatments (Day4)

Contents
Introduction
For the next experiment in this module you will use the CometChip assay developed in the Engelward Laboratory. The CometChip assay is used to assess various types of DNA lesions, including base excisions, abasic sites, strand breaks, and crosslinks.

In the CometChip assay, cells are loaded into microwells that are 'stamped' onto an agarose gel sieving matrix. Specific treatments can then be applied to the cells within these microwells that induce DNA damage. The cells are then lysed to release the DNA into the microwell. Following cell lysis, the CometChip is incubated in an alkaline buffer that unwinds the DNA. This step allows for all types of DNA damage to be detected. Lastly, gel electrophoresis is used to separate the DNA fragments. DNA fragments migrate away from the microwell and generate a comet tail as shown in the image to the right (panel A). The distance that the DNA migrates (i.e. the length of the comet tail) is proportional to the amount of damage. For example, with cells not treated with a DNA damaging agent, there are no evident comet tails to the right of the microwell or 'head' (panel B, image on the left); however, in cells treated with a DNA damaging agent there are comet tails apparent (panel B, image on the right). Comet tail lengths can be compared across experimental treatments to determine the deleterious effects of chemicals and toxins on DNA stability. In addition, the CometChip assay can be used to study the rate and efficiency of repair in response to specific treatments.
Protcols
Part 1: Load CometChip
You will use a CometChip and cells prepared for you by the Instructors to load the CometChip in the main laboratory. It is important that you consider the following details before loading for your experiment.
- The density of your cell suspension (500K cells / mL) will determine the volume you load into each macrowell of the CometChip.
- Calculate the volume of cell suspension that you will need to load such that 25K cells are added to each macrowell. Check your math with the Instructor before moving forward.
- Retrieve a CometChip from the front laboratory bench.
 CometChip diagram showing well alignment.
- You will also need to gather one glass plate, one 96-well bottomless plate, and four 1.5" binder clips from the front bench.
- Remove your CometChip from the 1x PBS and place it, gelbond side down, on the glass plate.
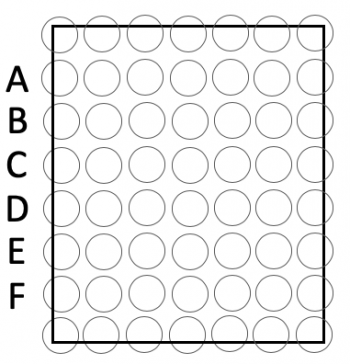
- Press the 96-well bottomless plate upside-down onto the CometChip so that the wells line up with your labeling as shown in the diagram on the right!
- The total size of the CometChip should be 5 wells across and six wells down. You should have extra space / wells around the perimeter.
- Be sure to press the top of the 96-well bottomless plate onto the CometChip. If you are unsure which side is the top, please ask the teaching faculty.
- Do not move the 96-well bottomless plate while it is on the CometChip as you will damage the agarose and the microwells.
- Use the binder clips to secure the 96-well bottomless plate to the glass plate, thus creating a 'sandwich' with your CometChip in the center.
- Fasten the binder clips to the very edge of 96-well bottomless plate as shown in the image below.
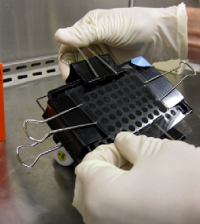 Binder clip placement for CometChip sandwich.
 - You will load into 30 wells total; 5 across by 6 down according to the map on the right!
- Fasten the binder clips to the very edge of 96-well bottomless plate as shown in the image below.
- Add the appropriate volume of your cell suspension (calculated in Step #1) to each of the macrowells.
- Cover the top of your CometChip with plastic wrap then incubate in the 37 °C incubator in the main laboratory for 15 min.
- After the incubation, complete a wash step to remove excess cells that are not within the microwells of your CometChip. Read all the bullets below before proceeding!
- Carefully remove the binder clips and the 96-well bottomless plate.
- With the CometChip on the glass plate, 'waterfall' ~5 mL of 1x PBS over the wells.
- Hold the glass plate at a 45° angle over the dish that you used to store your CometChip.
- Pipet up ~5 mL of 1x PBS.
- Press the pipet tip onto the glass plate above your CometChip.
- As you expel the 1x PBS, move the pipet tip from left-to-right.
- The 1x PBS should pass over the top of the CometChip and fall into the dish.
- Use a P200 tip attached to the pasteur pipet to aspirate the excess liquid from your CometChip wells.
- Lightly touch the tip to the bottom of each imprinted well on the CometChip and immediately lift the tip from the agarose.
- Use the molten 1% low melting point (LMP) agarose is located in the 42 °C waterbath on the front laboratory bench to 'trap' the cells in your CometChip.
- You will need to work quickly from this point as the LMP agarose will solidify as it cools.
- Using the P1000, pipet up 1000 μL of molten agarose from the bottle.
- Hold the pipet tip over the top left well of your CometChip and as you expel the agarose move the pipet tip from left to right. Ensure that each row of your CometChip gets covered.
- The goal is to lightly cover the wells that contain cells, which will 'trap' the cells into the microwells.
- If the LMP agar 'fell' off the CometChip in any areas during this process, it is important to 'fill in' those portions of the CometChip. Please alert the teaching faculty if you experience any difficulties!
- Leave your CometChip undisturbed on the benchtop for 3 min then carefully move it to the 4 °C cooler for 5 min to ensure the LMP agarose solidifies.
- Use the microscope in the main laboratory to ensure you have cells loaded into your CometChip.


Part 2: Treat cells
Apply MMS treatment
Apply As treatment
Reagents list
- agar, low melting point (from Invitrogen)
- phosphate buffered saline (PBS) (from VWR)
Next day: Complete DNA damage experiment